Desktop Edition Initialization
Initializing Your Data
Out of the Box
Out of the box, BuxxIQ needs to create the initial database. You’ll be prompted for where you want to put it.
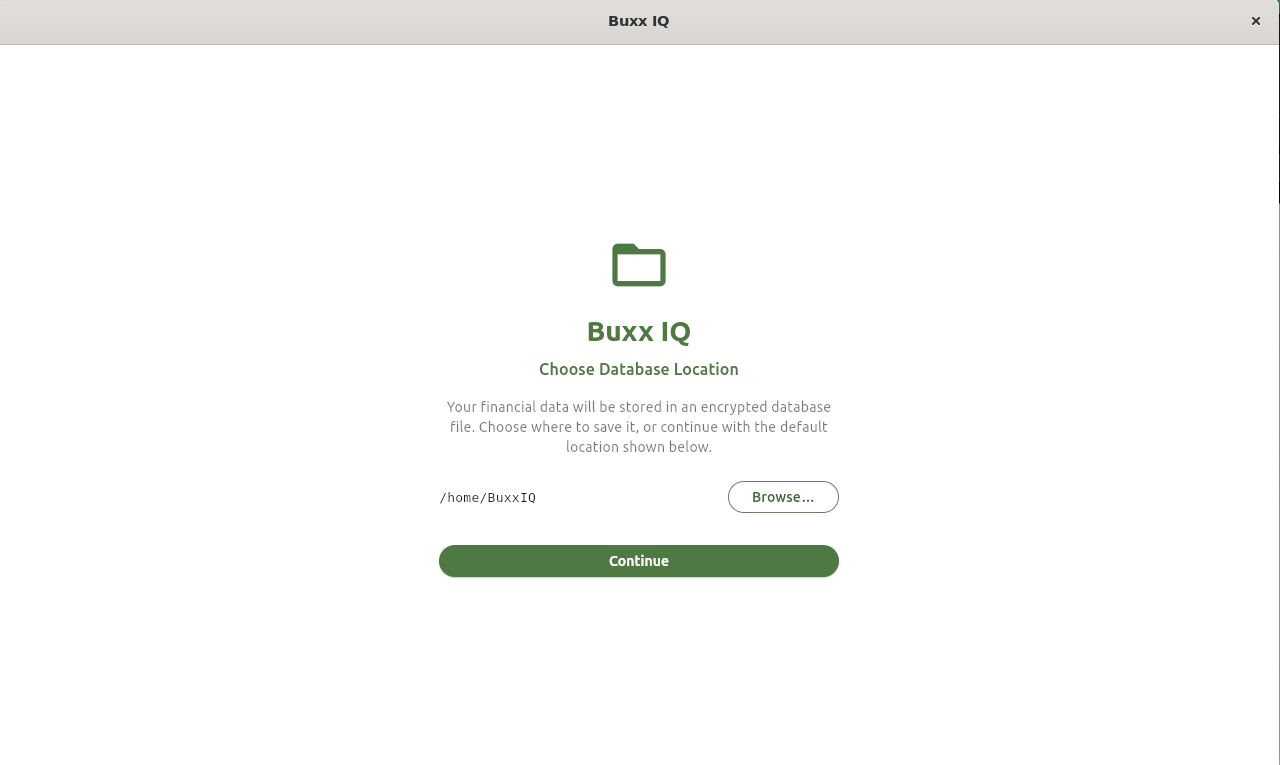
Remember, BuxxIQ runs against a local copy of the database. Meaning if you locate the database file on a cloud drive, you’ll most likely experience data latency problems as the cloud service tries to synchronize data as BuxxIQ is running. Your best bet is to locate the database locally, and when you’re done, either your preconfigured backup service will do its magic, or you can then copy the db file (more later) to a cloud folder to back it up manually.
You’ll then be prompted to set a passphase for the database. And to confirm that you’ve memorized, saved this passphrase somewhere safe. We have no way of reverse engineering db access if you lose this passphrase. Save it somewhere, maybe a password vault, or the like. But, do not forget it!
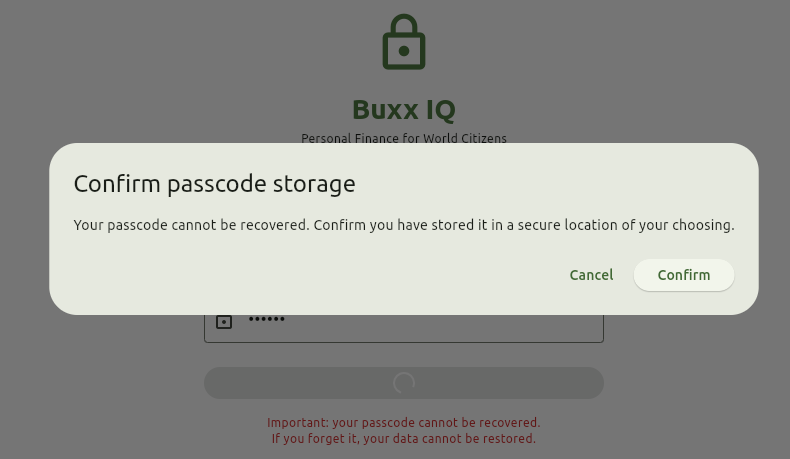
Once confirmed, you’ll be presented with the initial dashboard view.
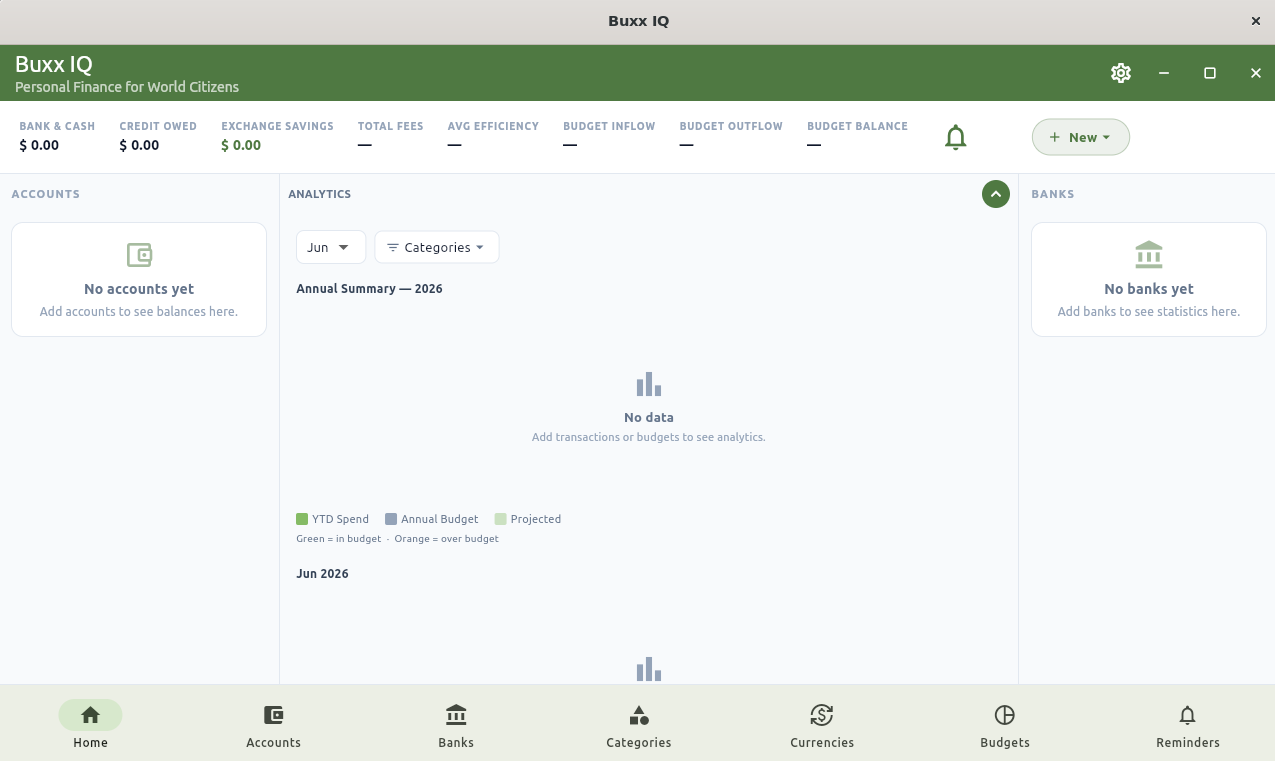
Yeah, not a lot there; which makes sense, as there’s no data (yet). To get said data in, you have a couple of options
- Create the various entities by hand
- Create a .csv import file of your existing data.
Importing Existing Data
Alas, we don’t know where your data is coming from. It could be from any of a number of other similar tool vendors, or it could be right out of a spreadsheet. Each of these will have their own format that needs special handling to convert to the expected import format. As a result, the creating of a csv file needs to be done by you.
Select the gear icon in the upper right, then ‘Import CSV’. You’ll be presented with the import screen. Click ‘Download Template’ Then select the text in the lower pane, cut&paste into a text editor of your choosing and go to town.
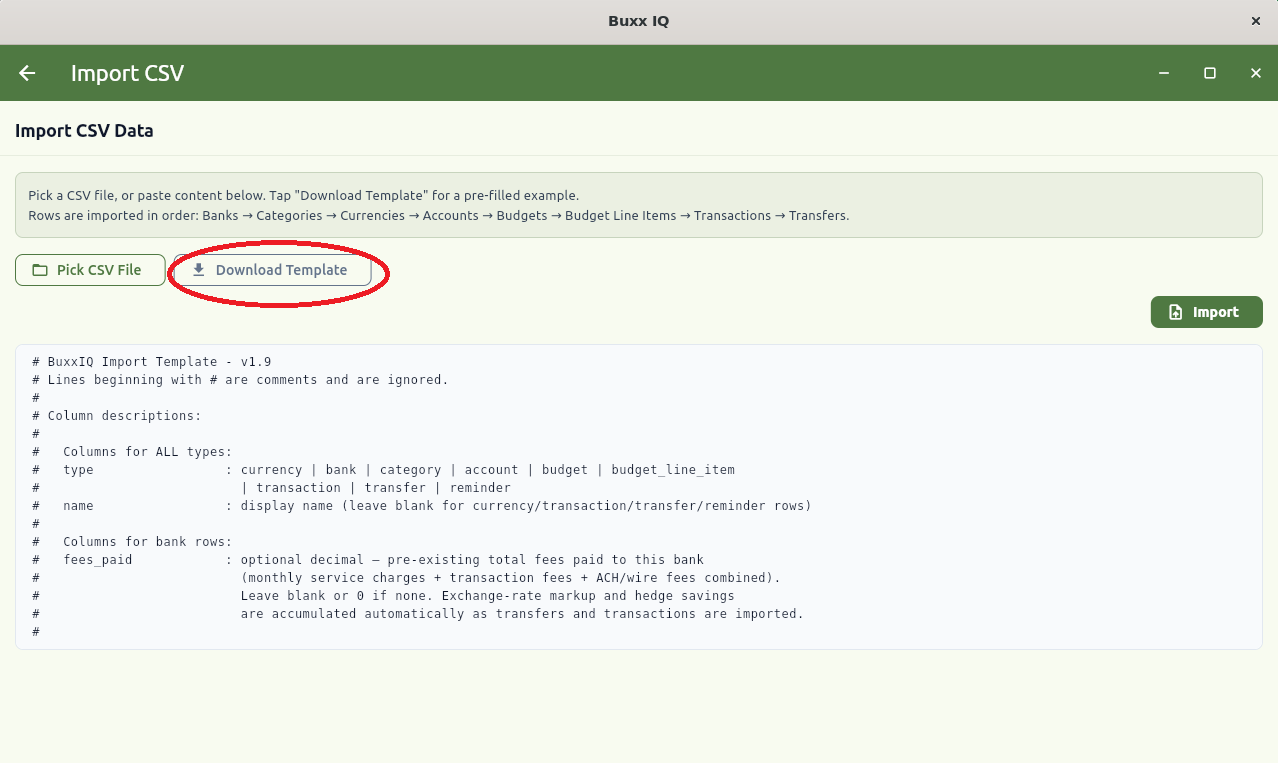
When you have a completed CSV file, select ‘Pick CSV File’, navigate to and select your .csv file, and then ‘Import’
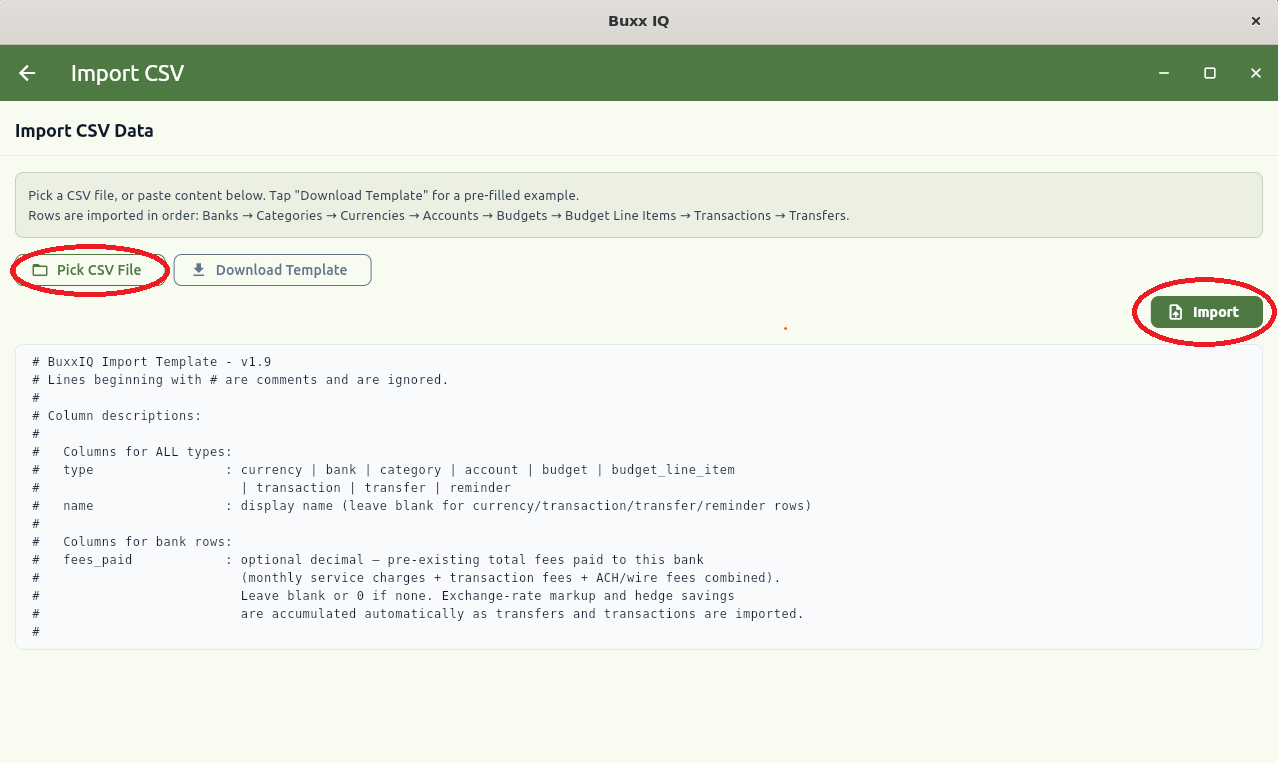
The importer will do it’s thing. Note, depending on the size of your import file, this can take some time, as exchange rates for your noted transactions and transfers will be evaluated for any exchange savings you may have acrued.
Errors, if they occur, will be reported below the import data.
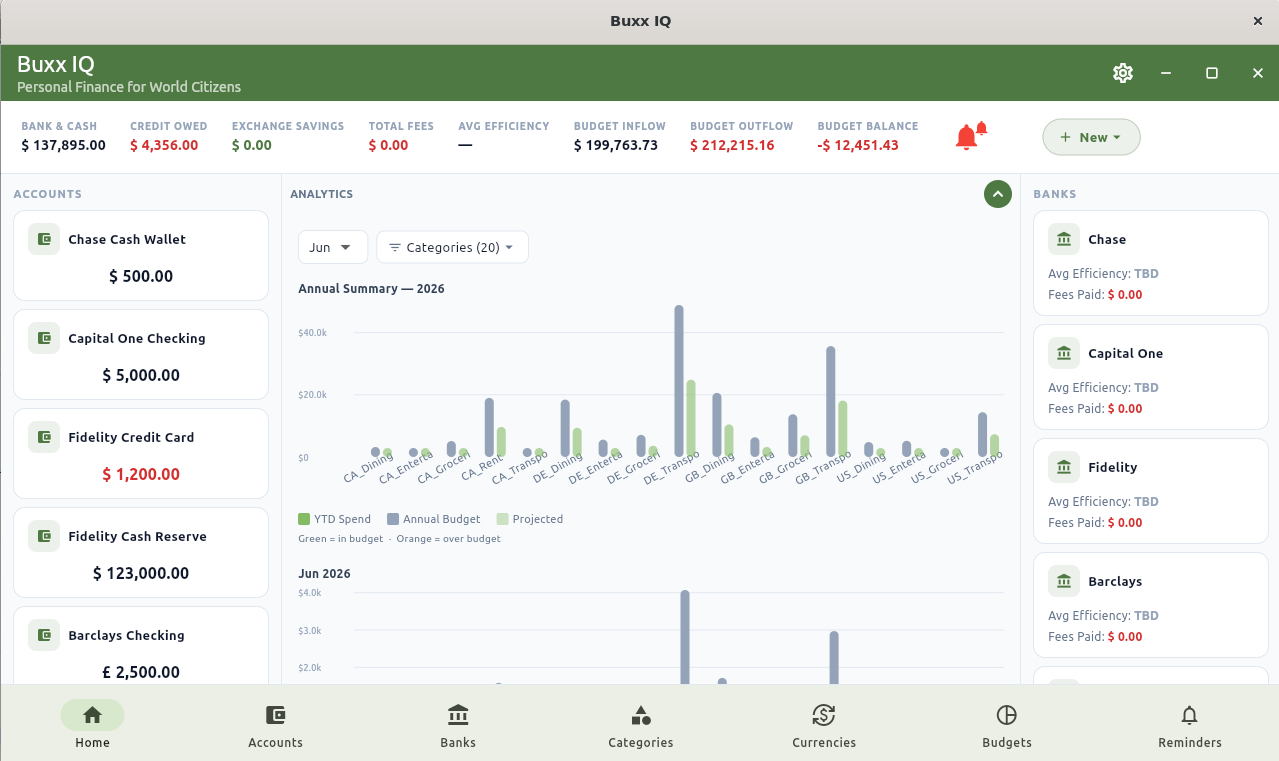
Finally, upon returning to the main dashboard you’ll see something like:
Manual Setup
Ok, we get it, getting a .csv set up can be a pain. You can, instead, do this by hand.
Due to the underlying database relationships, the various entities do need to be done in order, however. Make sure to do things in this order:
- Settlement Currency
- Banks
- Categories
- Accounts
- Budgets
- Reminders
Settlement Currency
Out of the box, BuxxIQ ships with USD as the settlement currency. Change this if you like. Select the currency, and note the ‘Set as Settlement’ at the top right.
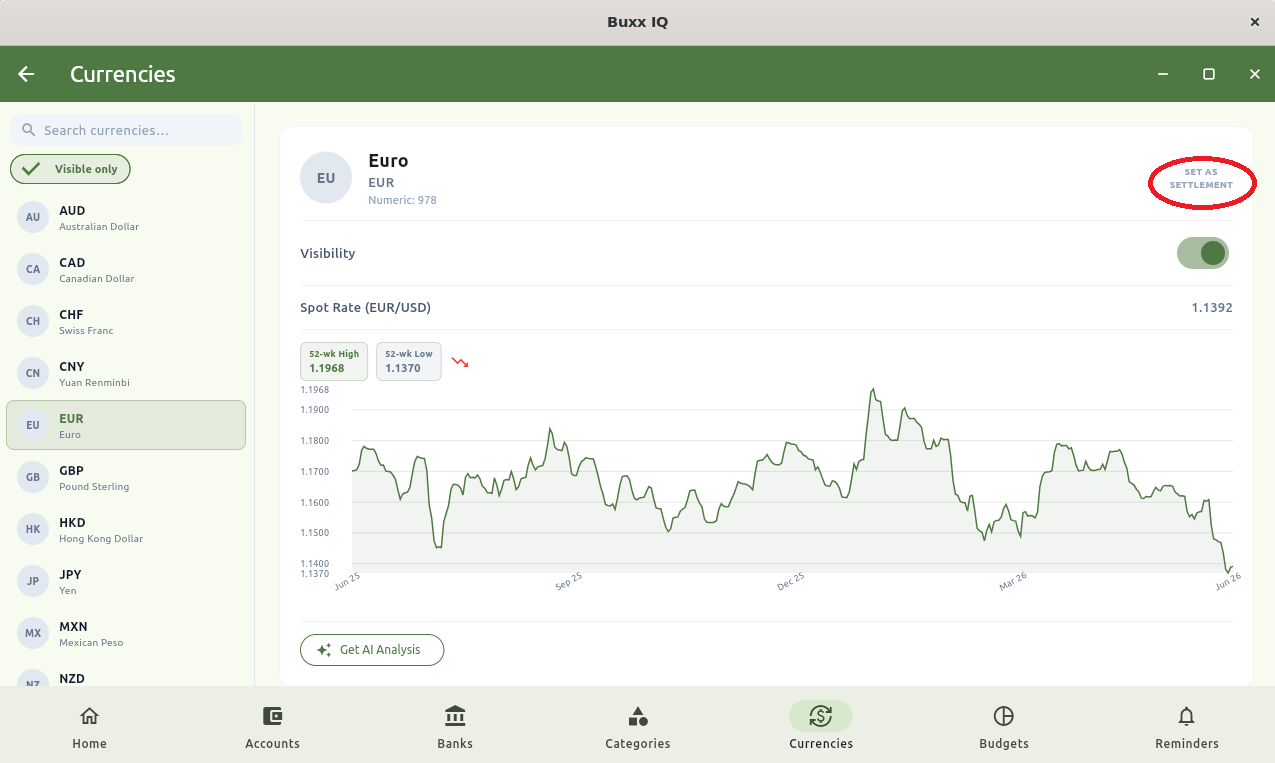
- Note - when first accessing a currency, exchange rate data is downloaded so you have a 52 week historical view of the price vs the current Settlement Currency. This may take upwards of 30 seconds to download and only happens when you access a given currency in a given BuxxIQ session.
You’ll be prompted to confirm the change.
Also note, it can be a pain to have to scroll through 156 or so currencies to find what you’re interested in. You can set your favorite currencies to be ‘Visible’ and then select ‘Visible Only’ at the top left to filter the currency list to your favorites.
Banks
Next create one or more banks. As described in Terminology, a bank entity is simply a place to anchor accounts, and a place to allow tracking of overall fees that accrue to the bank as well as its efficiency in handling transfers.
You can access the bank view either by ‘New’ -> ‘Bank’ or by ‘Banks’ on the bottom nav bar.
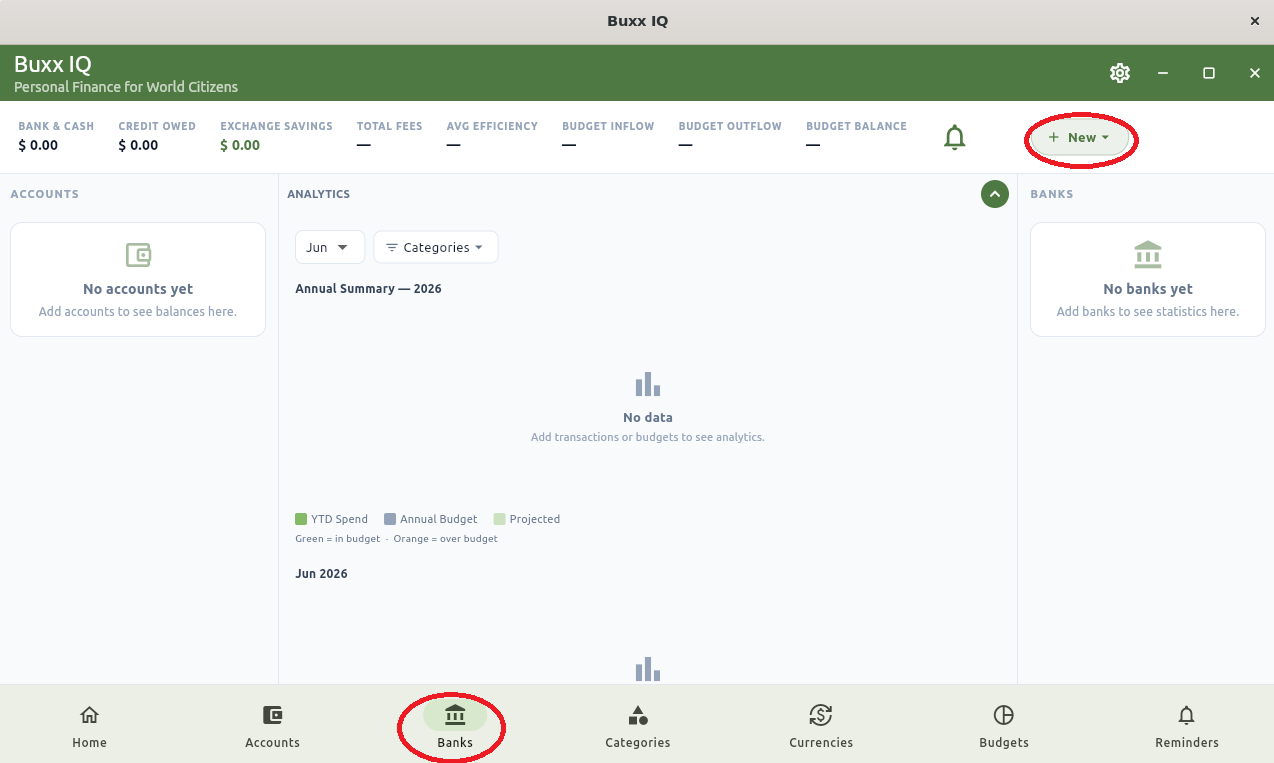
If you enter via ‘New’ -> ‘Bank’, you’ll be presented with the form to enter the bank’s name. If you entered via the Nav bar, you’ll need to click on ‘Add Bank’ to have the form presented.
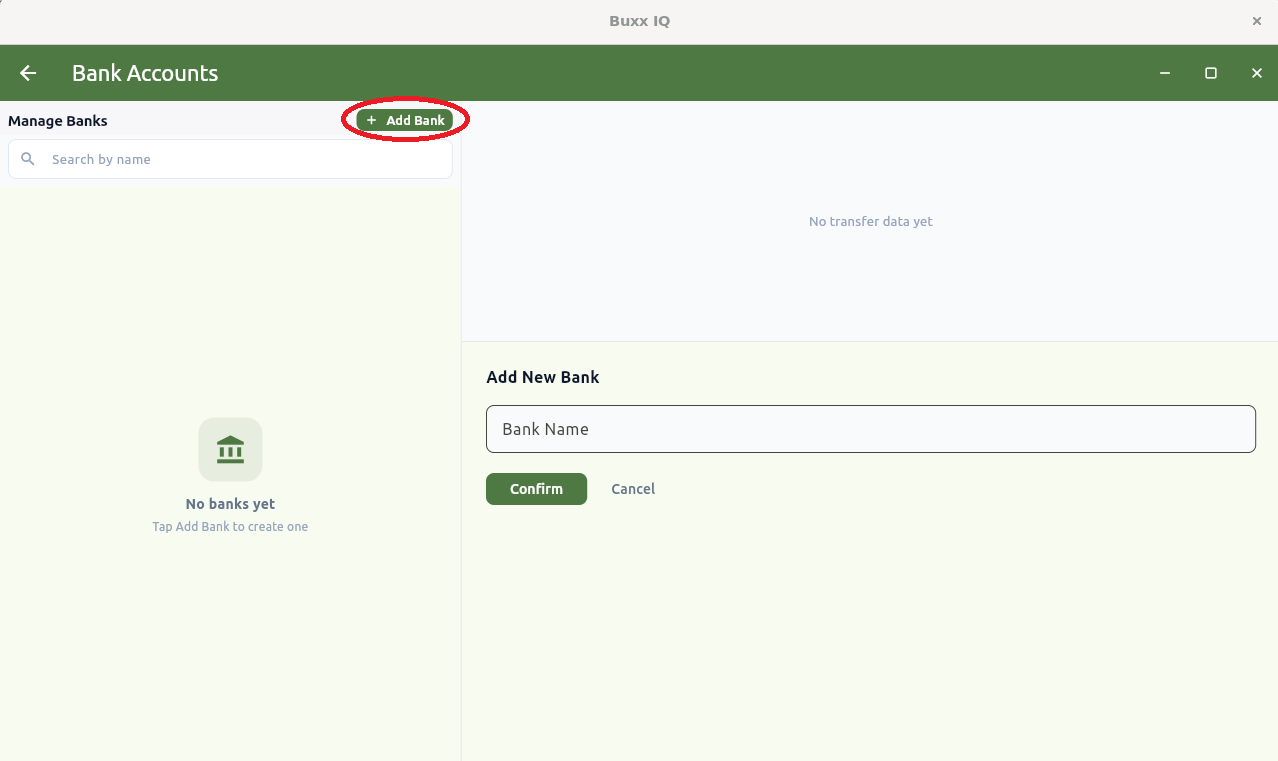
When you’re done, you’ll have something like:
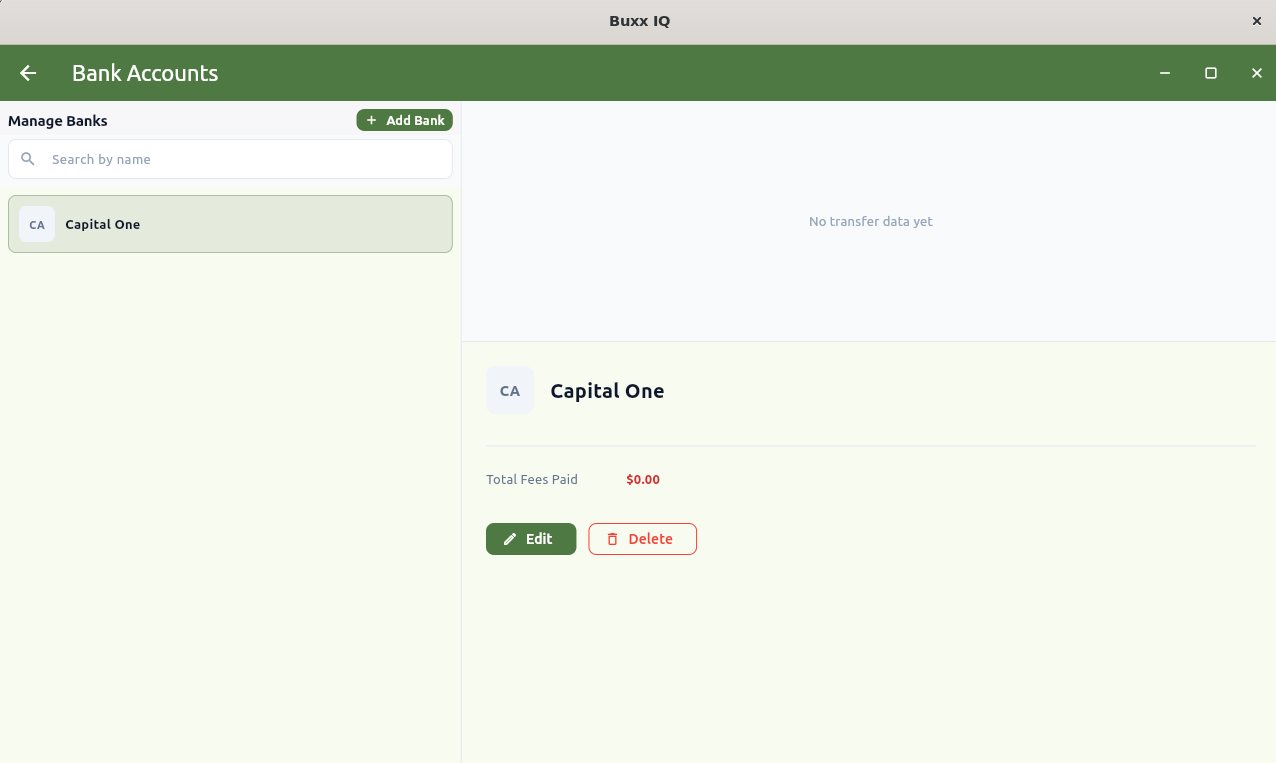
Categories
Now, you create Categories, the buckets used to track inflows and outflows of money.
Like with banks, select either Category from the nav bar, or ‘New’ -> ‘Category’.
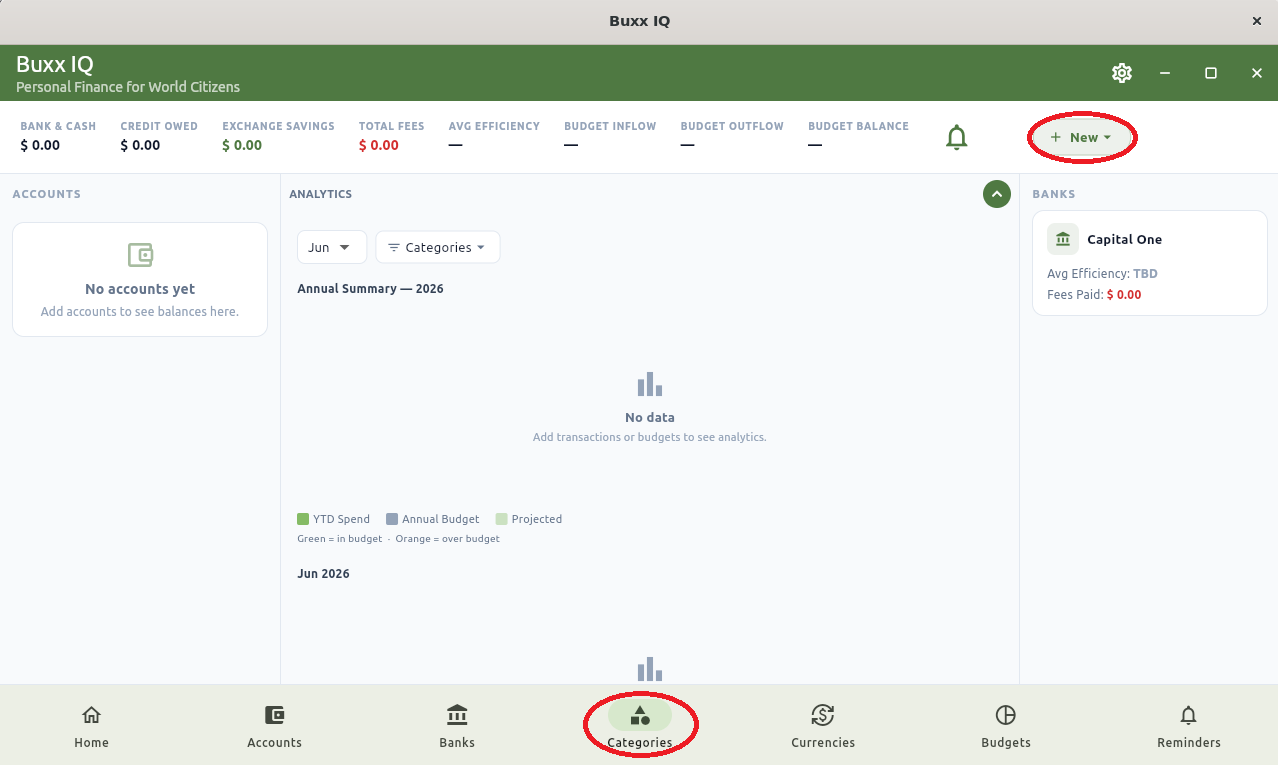
If you enter via ‘New’ -> ‘Category’, you’ll be presented with the form to enter the category’s name & associated currency. If you entered via the Nav bar, you’ll need to click on ‘Add Category’ to have the form presented.
When you’re done, you’ll have something like:
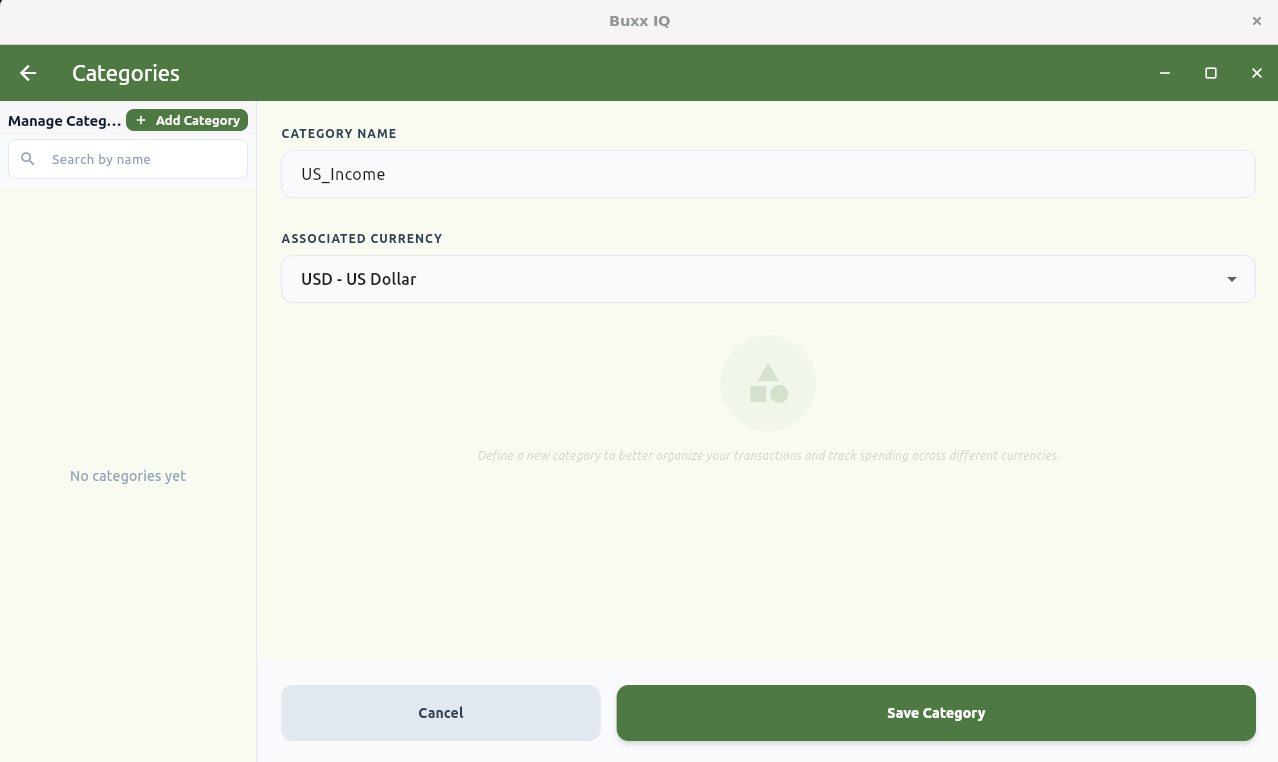
Repeat this process, adding additional categories and their associated currencies to create as many such buckets as you see fit. Note the name you choose will be text searchable in various dropdown menus. So, even if you add many such categories, they’ll be easy to find.
Accounts
Like Categories and Banks, you can access the Account form by either the Account link on the Nav Bar, or via ‘New’ -> ‘Account’.
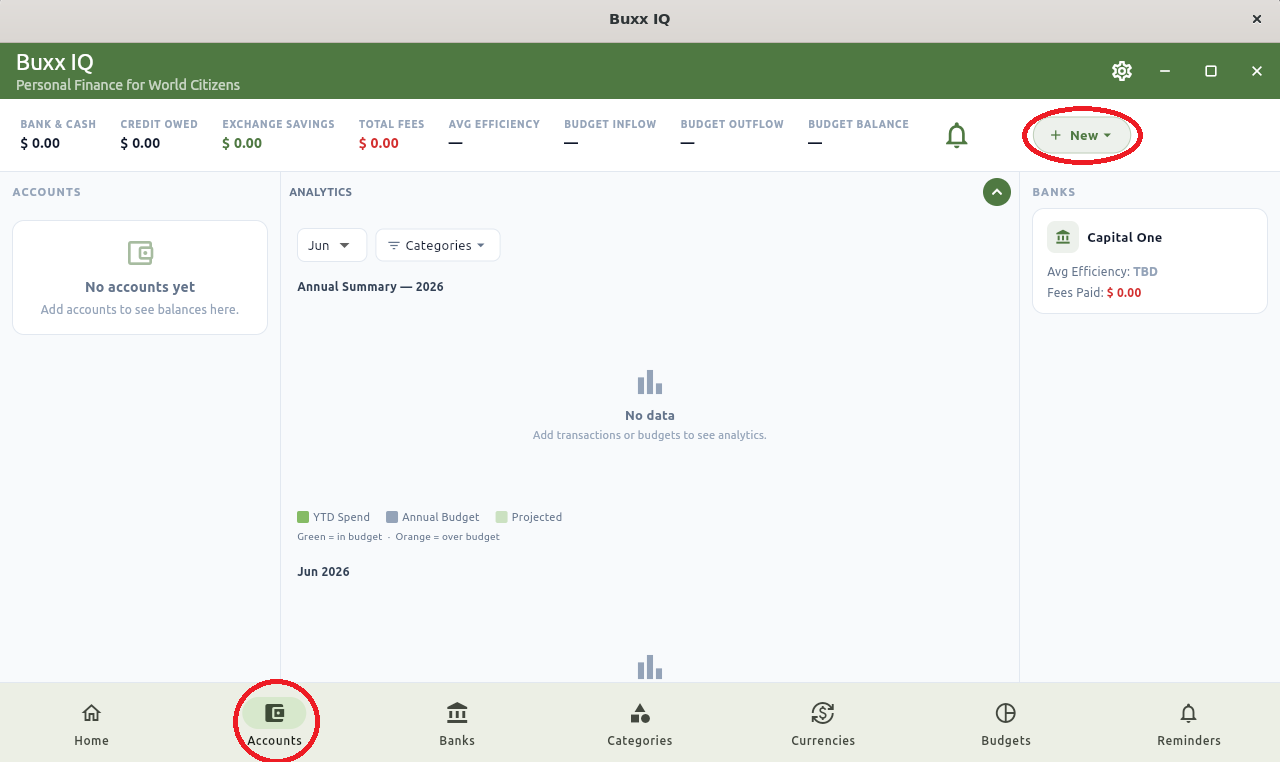
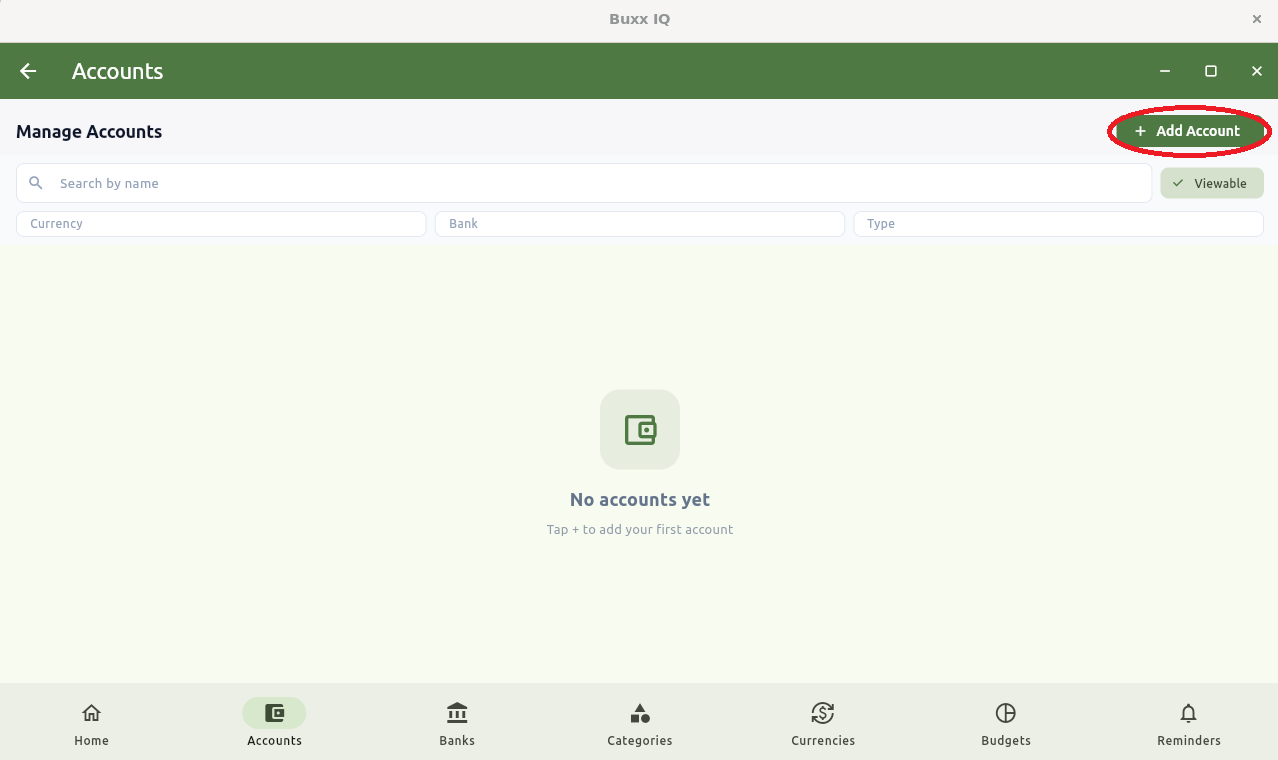
If you enter via ‘New’ -> ‘Account’, you’ll be presented with the form to fill in the relevant content. If you entered via the Nav bar, you’ll need to click on ‘Add Account’ to have the form presented.
By either route, you’ll be presented with the form to add account information:
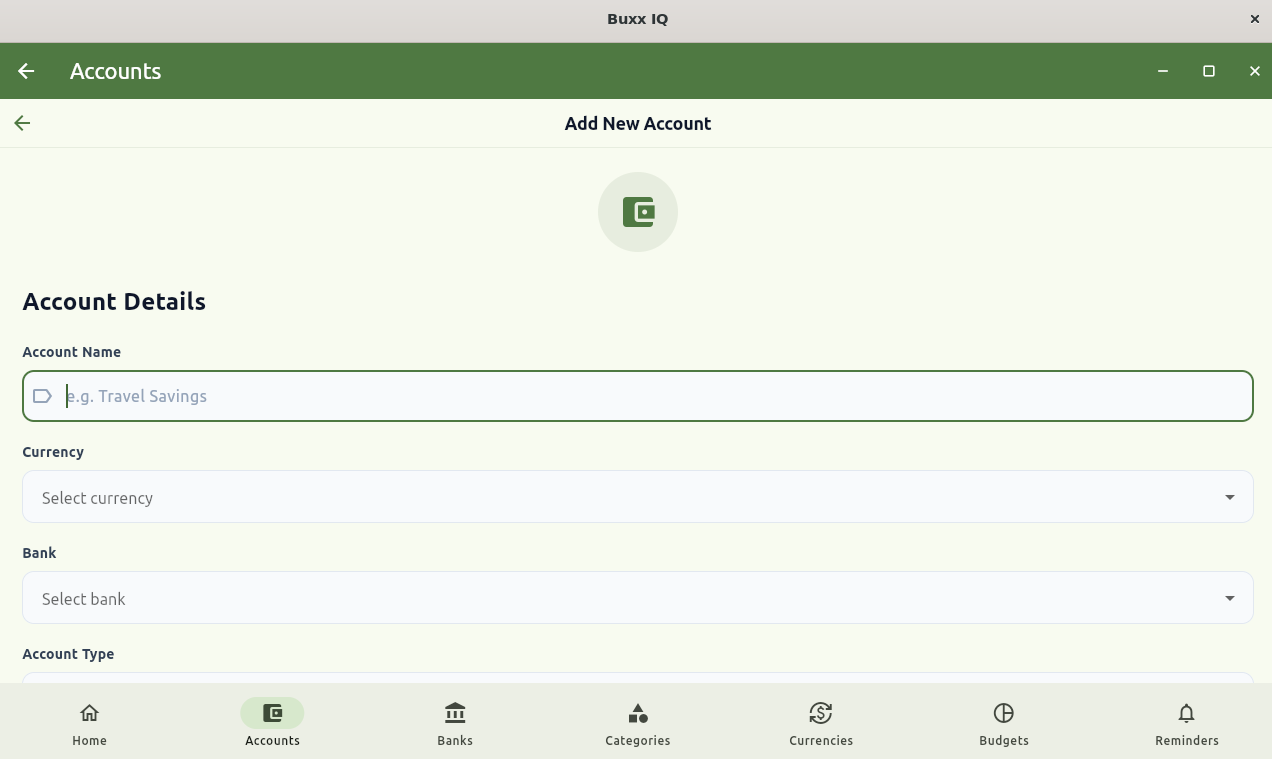
The details to be added are:
- Name - how you want to reference the account. This name will be displayed on the dashboard as well as in dropdowns.
- Currency - the currency in which the account is denominated.
- Bank - which of your pre-configured financial institutions holds the account.
- Account Type - one of the following:
- Cash - an account that has no associated fees and pays no interest. Cash in your wallet might be a good example.
- Credit - an account that allows you to take on debt and pay it back later; albeit with service fees and assessed interest.
- Bank - an account that may have associated service fees and perhaps pay you interest. A checking account or interest bearing Savings account are good examples.
- Initial Balance and Date - the balance and date of that balance in the account’s currency. For Credit accounts, this should be a negative value; ie you owe them money.
- Initial Settlement Rate - if you happen to know what the Account Currency to Settlement Currency exchange rate for the initial funds are, enter it here. If you do not know, the mid-market rate for the Initial Balance Date will be used.
- Visible - Yes or No - do you want this account to be visible in account lists. For infrequently used accounts, hiding them can make it easier to find the accounts you use regularly. This can be changed after initialization, if your needs change.
After confirming, you’ll see your account on the account list:
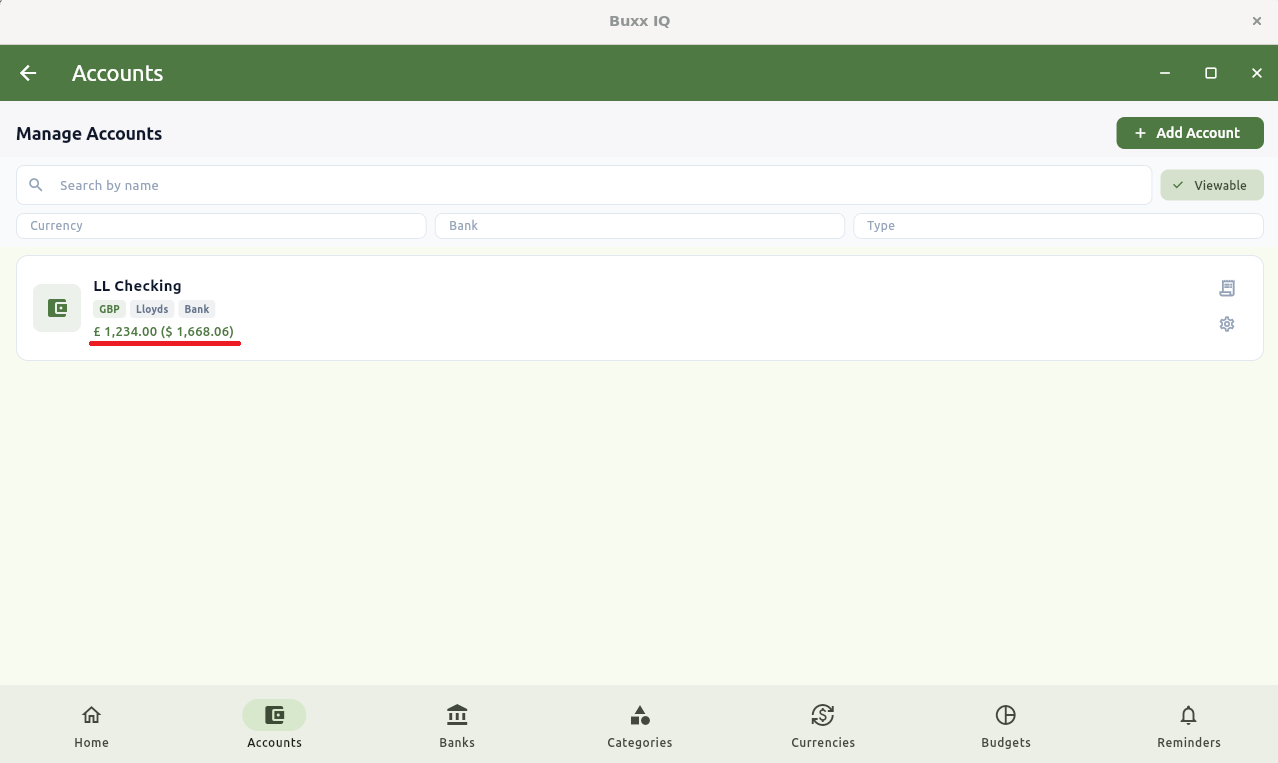
Note the display of the current balance in the account’s currency, and the settled value (converted to your settlement currency) in parentheses.
Clicking through the account icon, you’ll see the account details.
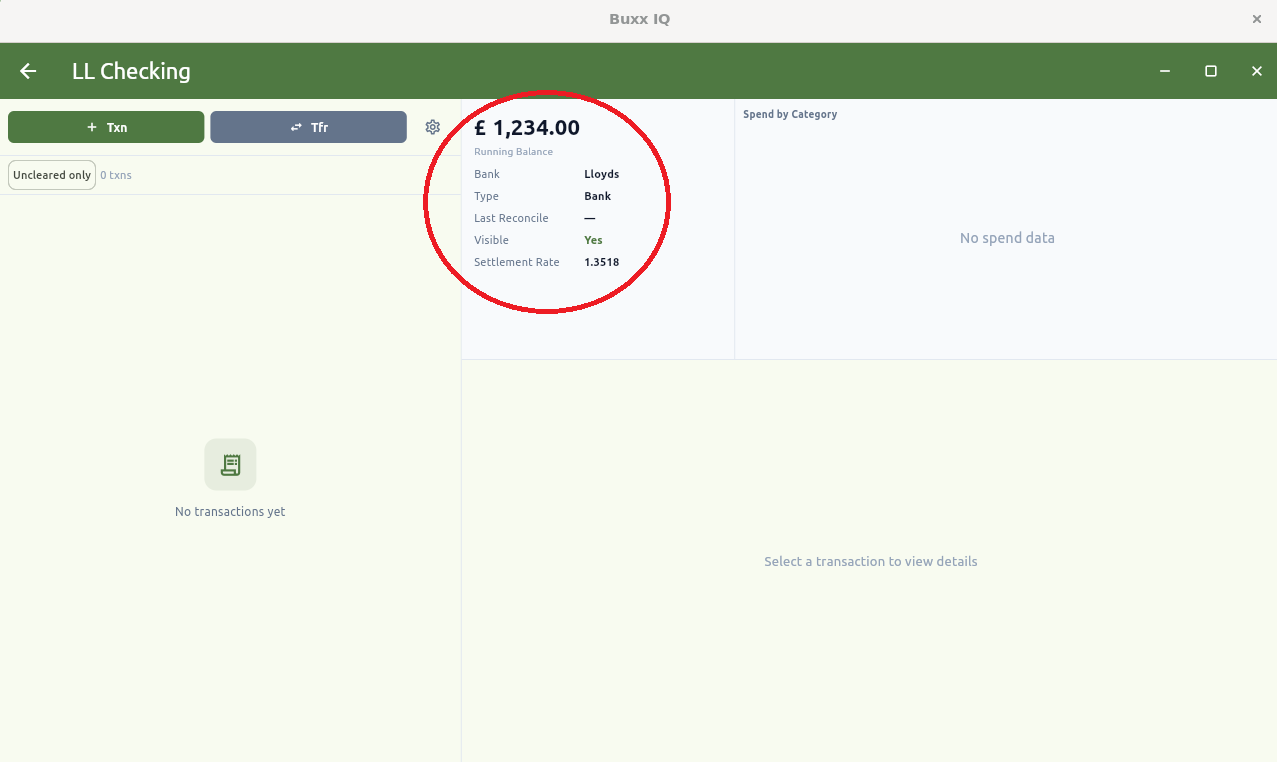
No transactions (yet), but in the details note the settlement rate - this will change over time as funds are added via deposits or via transfers from other BuxxIQ accounts.
Budgets
Budgets have two aspects
- The budget itself - which is the Budget’s name
- Budget Line Items - a set of budgetary line items associated with the budget in question. Generally, each of your defined categories has a budget line item.
Create the Budget itself, accessing the budget form as you did with Banks, Categories and Accounts. Either the Budget link in the nav bar, or via ‘New’ -> ‘Budgets’
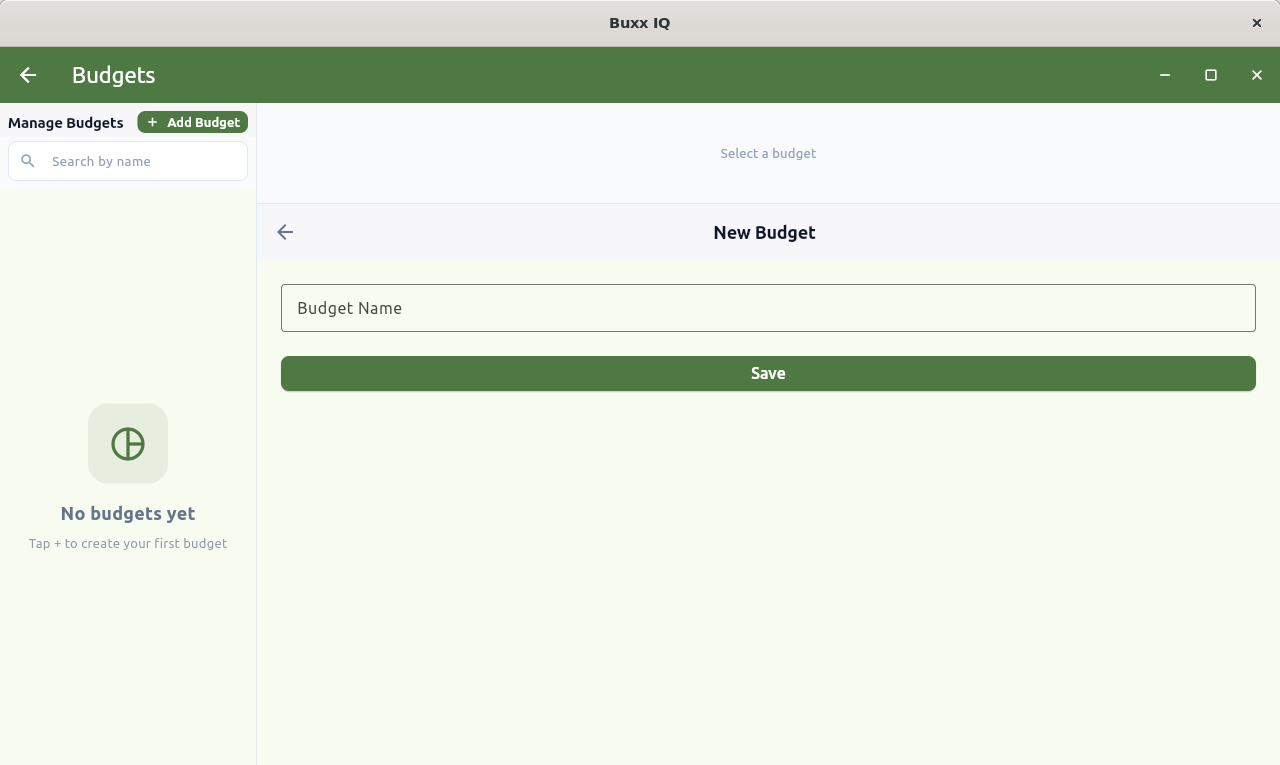
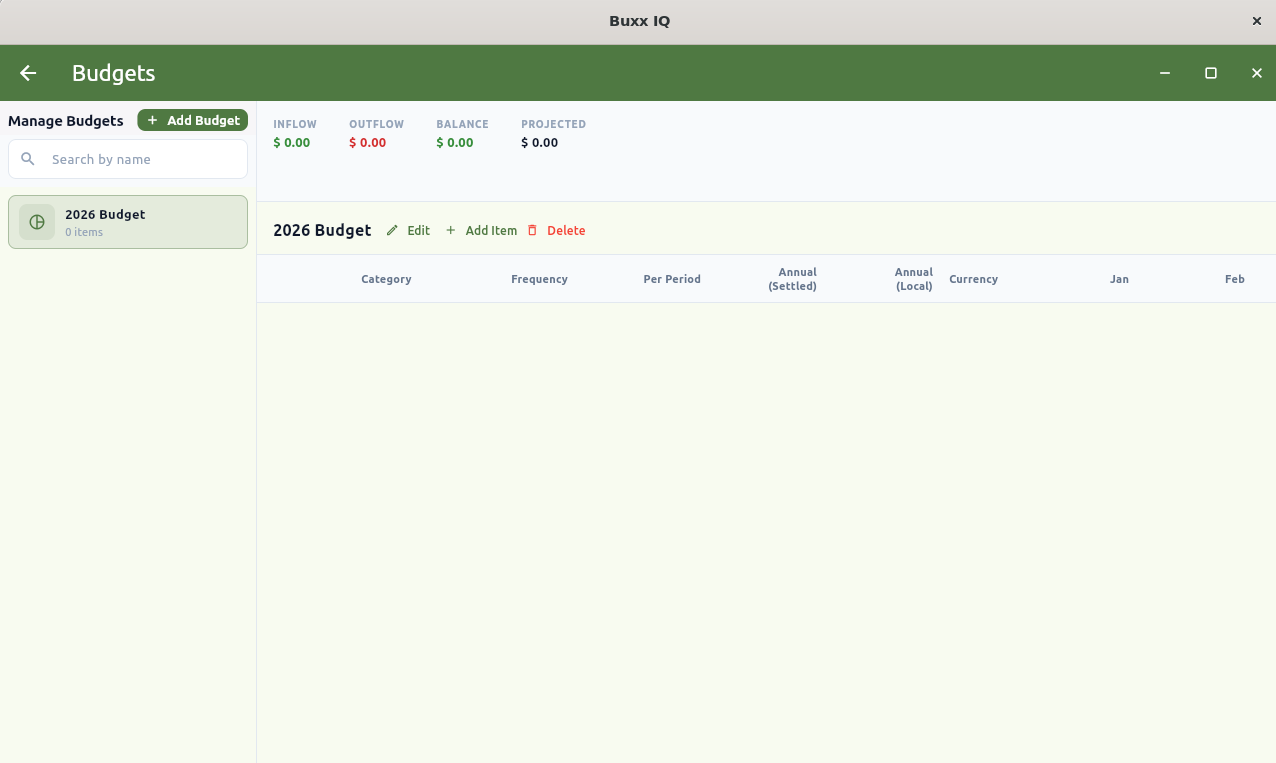
Now it’s time to add budget line items. Click on ‘+ Add Item’, and you’ll get the following:
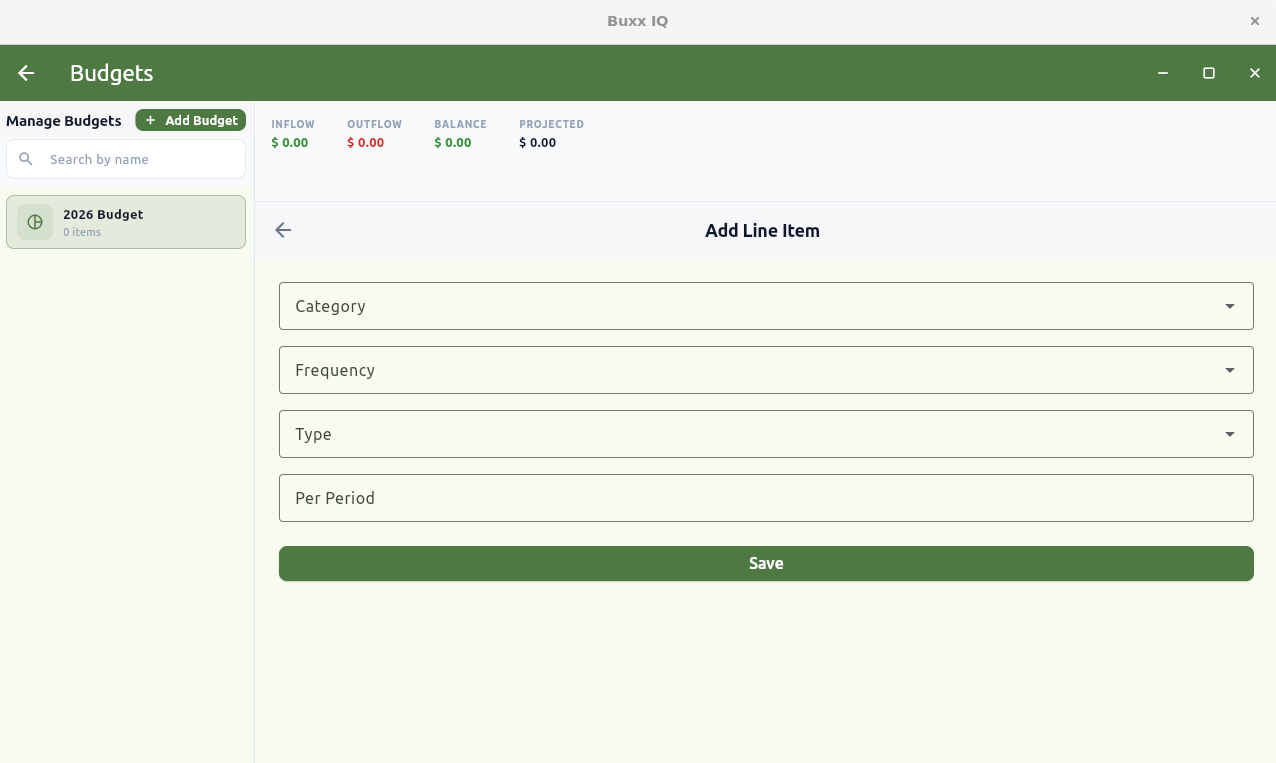
Select the cateogory, frequency, type (inflow represents funds entering the system, outflows are funds exiting the system) and the per-period budget amount in the category’s currency.
For example, if you have a category called DE_Rent, for rent payments in Euros that you pay monthly, your form may look like:
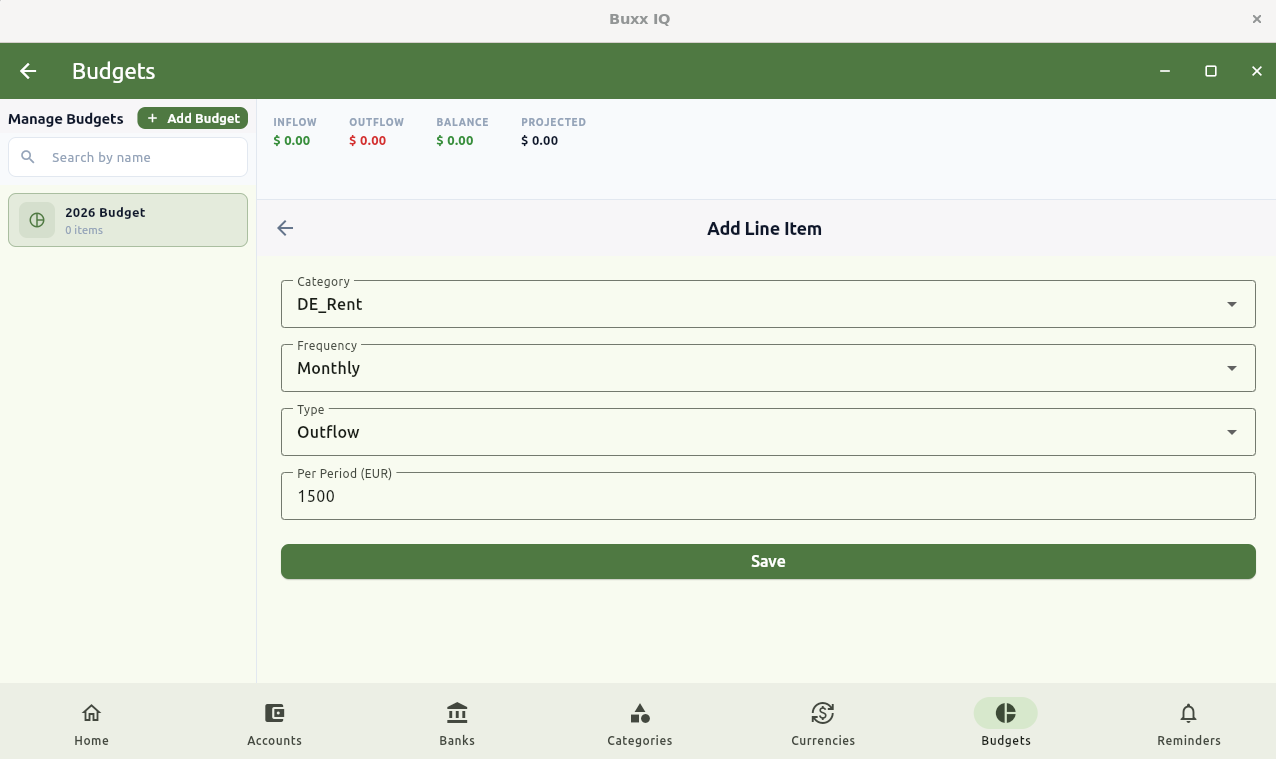
Repeat this for all your categories.
Once done, a summary of your budget (for the current year in settled currency) is presented at the top.
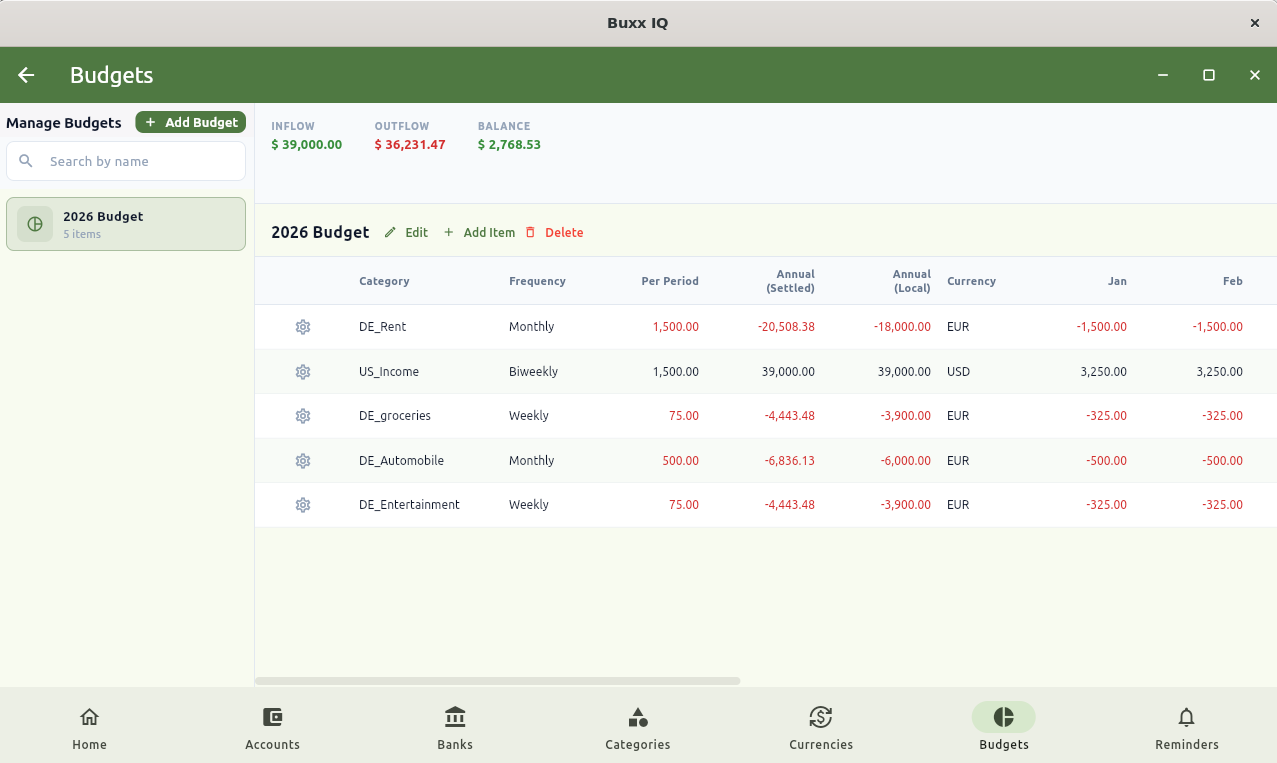
Each category presents the yearly total in local and settled currency, with a monthly breakdown (in local currency) to the right.
At the top, totals (in settled currency) are presented for total inflows and outflows, as well as the difference; Balance. In the example above, inflows outweigh outflows.
Reminders
Not strictly necessary, but helpful! They remind you of upcoming transactions and can be used to gauge whether you have funds sufficient to cover your planned spending.
By creating a Reminder, you’re planning a recurring future transaction or transfer. When it’s due, enter it, and it will be rescheduled for the future based on the frequency you set.
You know the drill, either the Nav bar, or ‘New’ -> ‘Reminder’. You’ll then be presented with:
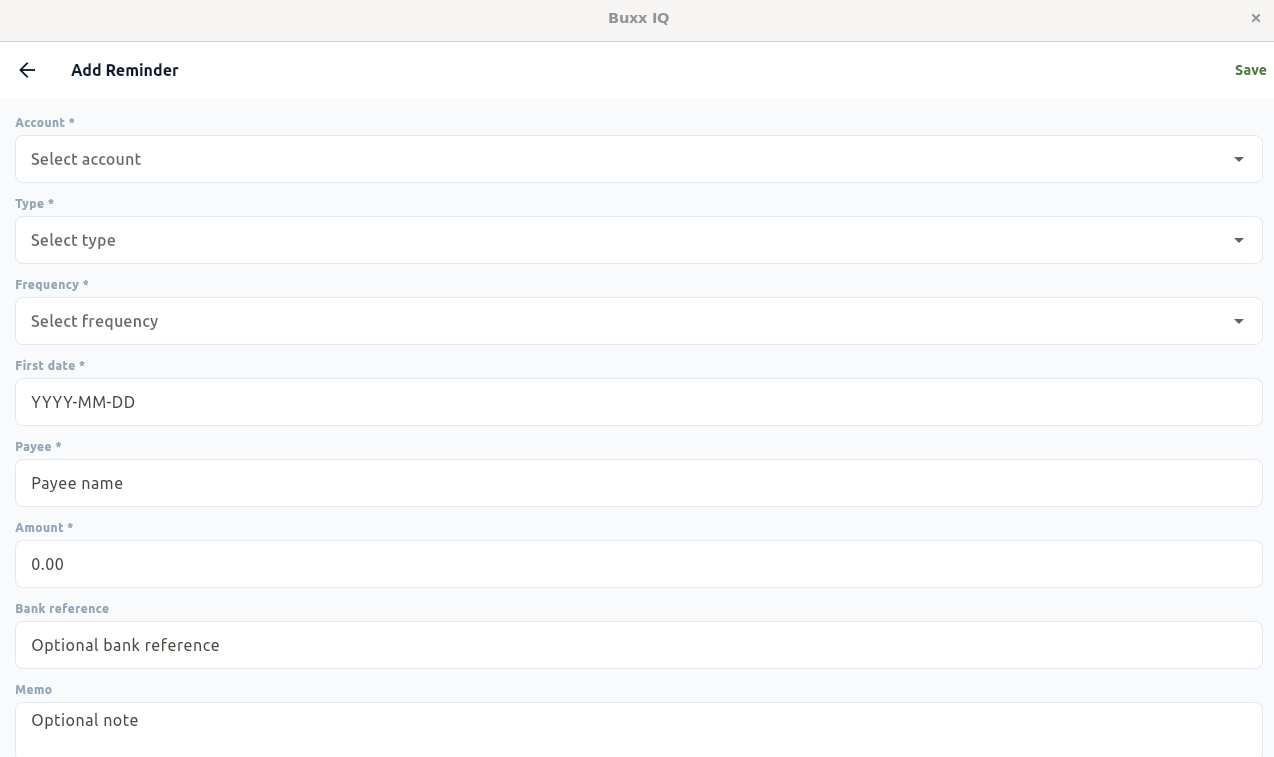
Choose the following:
- The account to which the resulting transaction or transfer applies.
- Type
- PYMT - a debit transaction - funds are going to leave the Account
- DEP - a credit transaction - funds are going to enter the Account
- TXFR - a transfer event - funds are going to move from one account to another
- Frequency - how often this reminder should occur.
- First Date - the first day for which this reminder should be scheduled
- If you selected ‘Twice Monthly’ for frequency, you’ll also need to select the second day in the monthly for the second event
- Payee - What you want to use to help you recoginize the ledger entry
- Amount - the value of the transaction in account currency
- To Account - if you selected TXFR in the type, enter the name of the destination account
- Bank Reference - optional, but allows you to capture specific bank supplied info about the entry
- Memo - optional, but allows you to capture any other details with which you wish to annotate the entry
For PYMT and DEP reminders, there will be a couple of other fields
- The currency for the transaction - which may be different from the account currency
- Whether the account’s settlement rate should be used for converting to the settled value, or whether the mid-market rate should be used.
- Whether the last day of the month should be used for rescheduled reminders; ie, if your first day is 31 Jan 2026, your next would be 31 Feb 2026. Oops! Use Last Day will make sure it properly uses 28 Feb.
Saving, you’ll see:
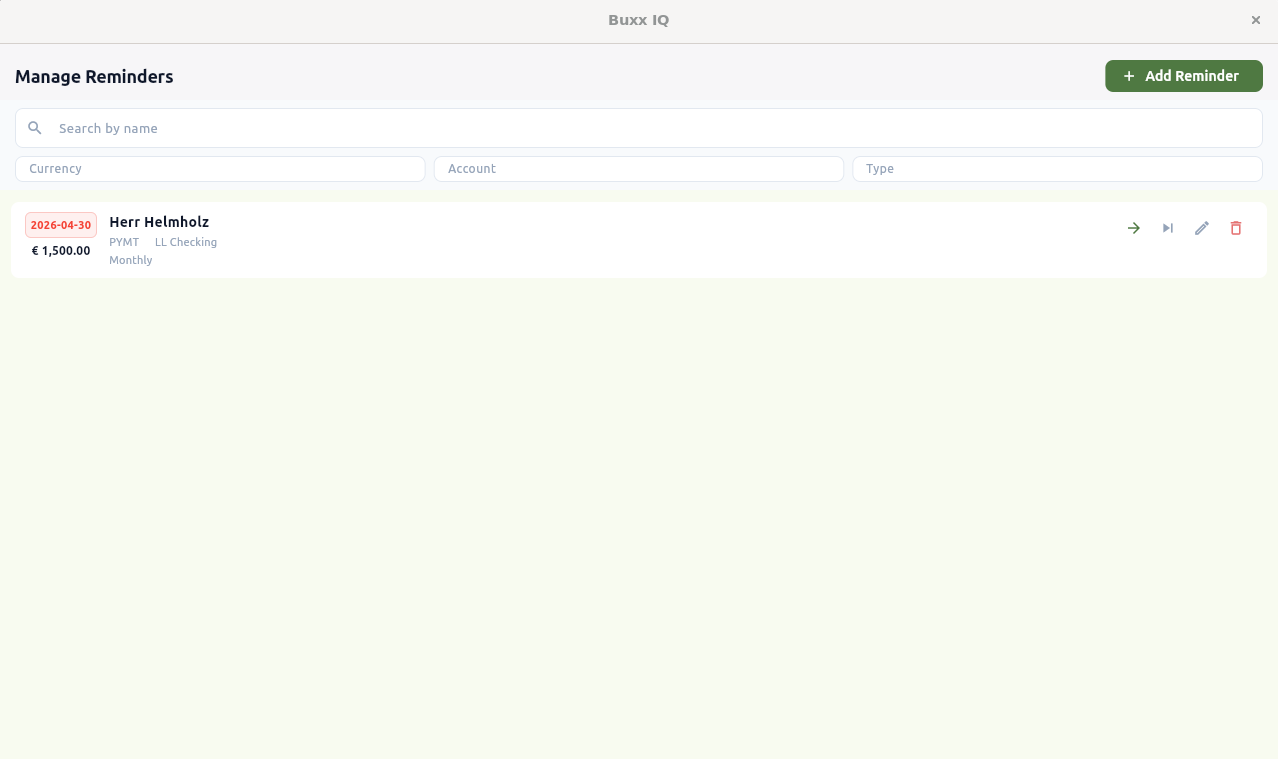
Repeat for as many reminders as you see fit.
That’s It
You have initialized your data. Returning to the dashboard you’ll see something like:
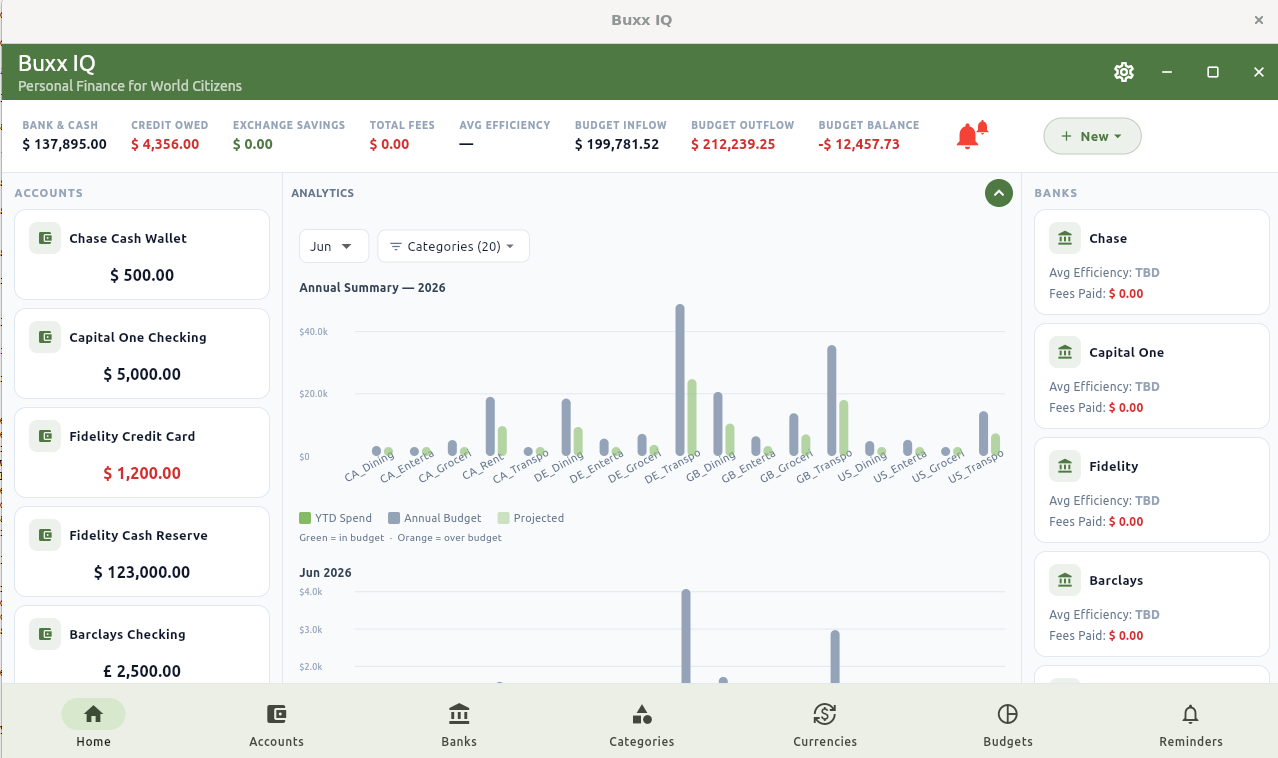
Move on to other blog posts for entering transactions and transfers, and how to use the dashboard to fully understand your financial state of affairs.